DIY Jiggle Deformer:
download jiggle.mb here
This is a simple jiggle deformer setup that I learned from someone
who worked at ILM. They came to Texas A&M and taught
part of a summer course. It was a great experience.
This was useful back before Maya had a jiggle deformer. It
may still be useful in certain situations. I used this setup
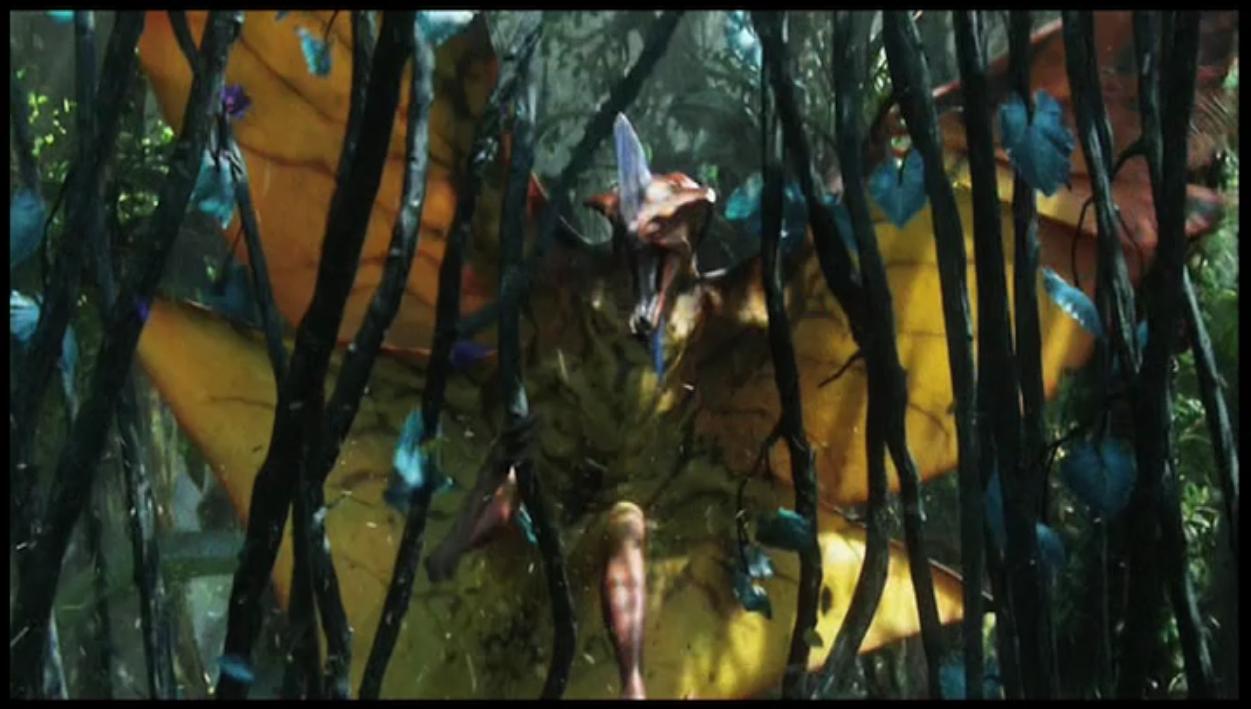
for the leaves on the vines in this sequence of Avatar:
The basic idea is to use
an IK Spline system where the spline curve is goaled to a soft
body duplicate of itself. This becomes a simulation, so you
can't scrub, but it's simulating one particle per joint so it
doesn't really effect playback speed.

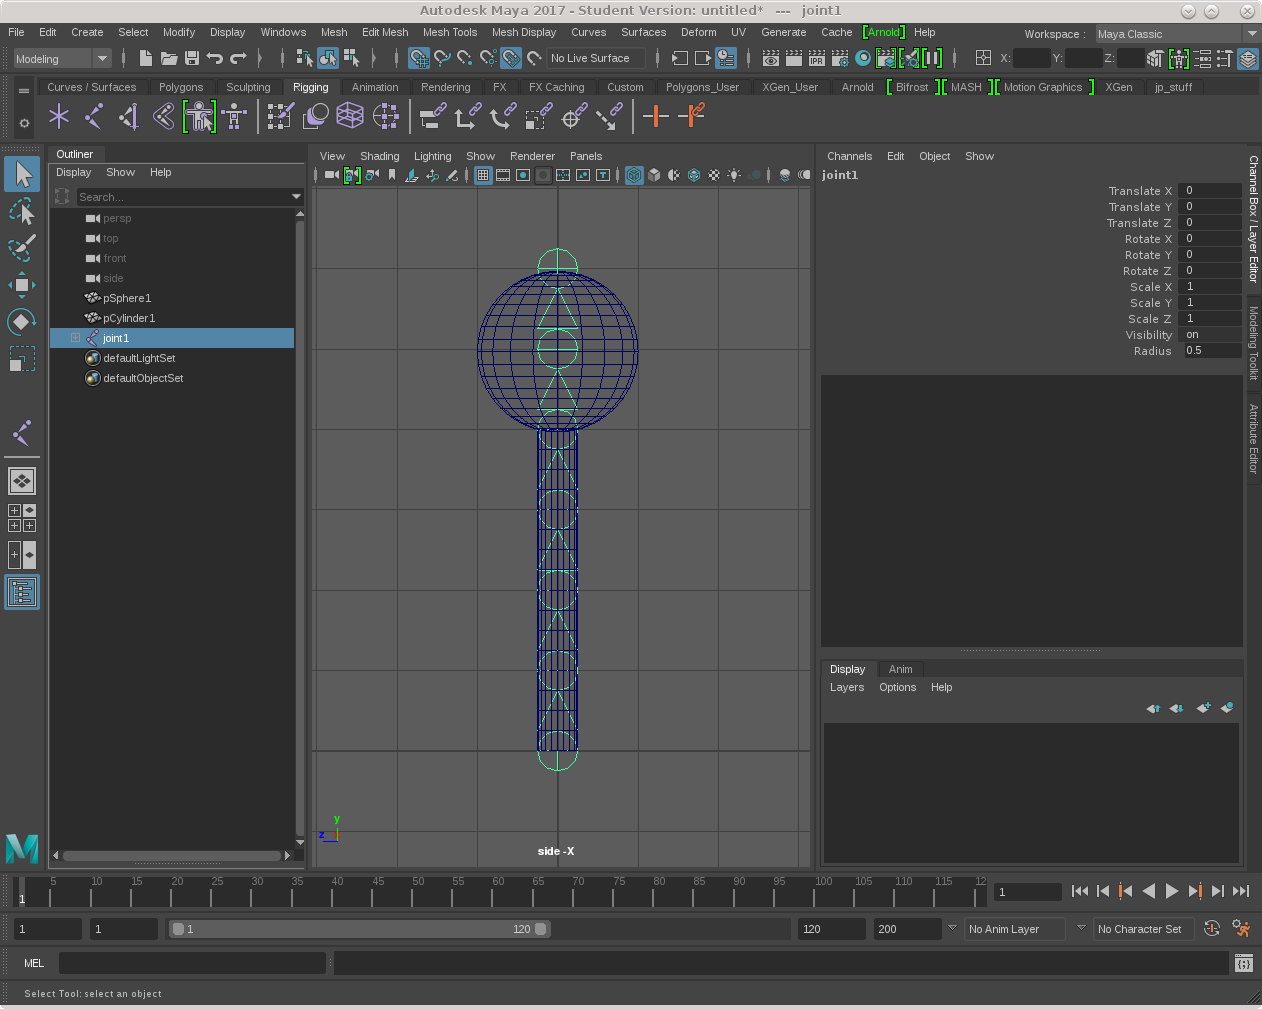
Step 1: Joints
Set up a
simple test cylinder with a sphere perched on it. Create a
joint chain. I created the joints in the side view with
snap-to-grid and snap-to-view-planes turned on.
Step 2: Curve
Next,
create a NURBS curve. Again in the front view, from the
create dropdown choose create--> curve tools --> cv curve
tool. Then just click on each joint to create the NURBS
curve CVs. Hit enter when you're done to end the process.
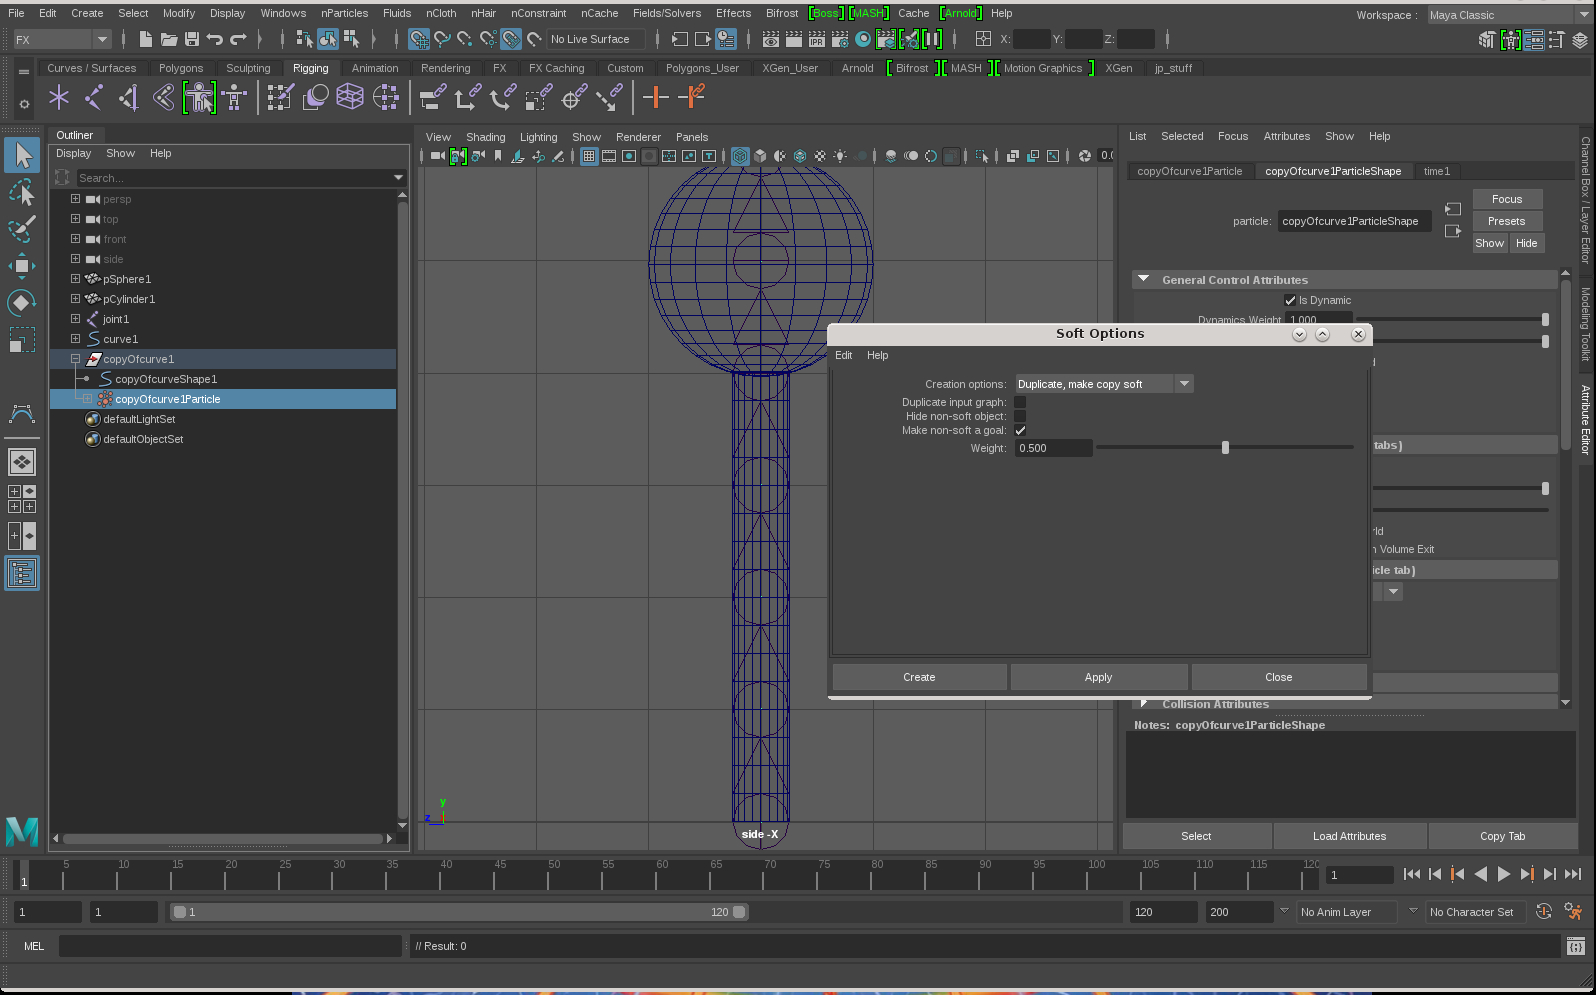
Step 3: Soft Body
With the
curve selected,
create the soft body. Note that Maya has two particle
systems, the old "Legacy Particles" and the new fancy
nParticles. In this case we can use the old
particles. Switch to the FX menu set. At the bottom
of the nParticles drop-down there is the soft body tool.
Open the options box for the soft body tool and choose
"Duplicate, make copy soft".
Tick the box that says "Make non-soft a goal". Change the
weight value to 1.0. Hit Apply.
Now, take a look at the child nodes of copyOfCurve1. In
addition to the usual copyOfCurveShape1 we also have
copyOfCurve1Particle. This is the particle system that will
drive the soft body that will drive the spline IK that will jiggle
our geometry. So, we still have to set up the spline IK and
then adjust the goal weights per particle.
Step 4: Spline IK
Creating the spline IK handle is a bit of a chore. First,
hide the cylinder and sphere geometry. Also hide
curve1. When we create the spline IK we will have to select
the driving curve in the viewport. Having the two curves
sitting on top of each other will make our job very difficult.
Switch to the Rigging menu set.
Choose Skeleton --> Create IK Spline Handle, and open the
options for that tool. Turn off "Auto create curve".
We already have a curve we want to use.
Choose Skeleton--> Create IK Spline Handle again, without the
tool options this time. Follow the instructions in the lower
left part of the Maya main window.
Select the root joint
Select the end joint
Select the copyOfCurve1
curve
As soon as you select the curve Maya should create the spline IK
handle, called ikHandle1. You can select that handle, but
you can't move it. It is a spline IK handle, meaning
it is being driven by a spline curve - copyOfCurve1 in our
case. We need some animation to test the follow-through
jiggle.
Set a keyframe on the transforms of curve1. Go froward a few
frames. Move curve1, the curve without the particles
attached, a few units away from the origin. Rewind and hit
play. The soft body curve and the joints should follow along
with some bouncing behavior. The particles are trying to
reach their goals.
Step 5: Goal weights
Now we need to adjust the goal weights for each particle, so that
one end is floppy and the other end is locked to the joint
system.
Select the particle shape node and open the Goal Weights and
Objects section of the Attribute Editor. Since we checked
off the "Make non-soft a goal" we should see a slider labeled
"curveShape1" set to 1.0 as we specified earlier. Just
double check that setting. You can also play with goal
smoothness. This is one of those abstract Maya
settings. It is basically a scale on how quickly or slowly
the particles reach their goals. For the gif above I left
the Goal Smoothness at 3.0.
Now we need to adjust the individual goal weights for the
particles, so we need to select them in component mode. This
may or may not be a pain in the ass. One way to select the
particles is to go to the "Show" drop-down at the top edge of the
perspective view and click Show-->None. Then open the
Show drop-down again and click Show-->Dynamics. Select
the particles with the mouse. Now right-click in the
perspective view and choose Particles. Now swipe over all
the particles to select them. You should see
copyOfCurve1Particle.pt[0:6] in the very top frame of the main
Maya window, towards the right.
Open windows --> General Editors -->
Component Editor. Click on the Particles tab. You
should see goalPP in the far right column.
Change the goalPP values so that they range between
0.5 and 1. You want 0.5 at the jiggly end, and 1.0 at
the rigid end. Rewind and play again. Adjust to your
liking. That's the whole setup. You could drive curve1
with another joint system that you could expose to animators, and
then hide or lock the curves, joints and spline IK handle.